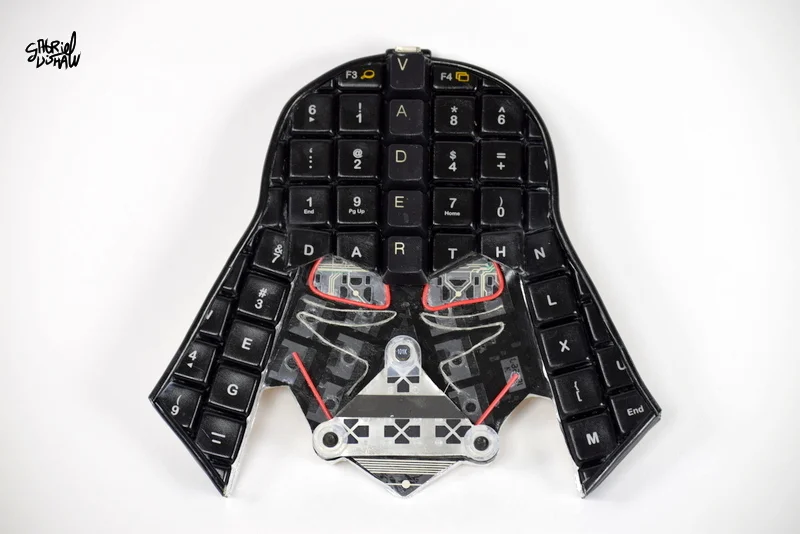
Overview - Thanks to Dremel's quality tools and support, I am able to bring you this "Upcycled Keybooard Vader Sculpture" tutorial. Whether you are new to upcycling, or a veteran upcylcler, you will find that this project tutorial easily scales to your skill level. This walk-through allows you to connect with your creative side, while exploring a practical solution to re-purpose things that would normally end up in a land-fill.
Gabriel
Tutorial: Upcycled Keyboard Vader Sculpture
Tools Needed:
- Flat Head Screwdriver
- Phillips Head Screwdriver
- Scissor
- Pencil
- Dremel Moto Saw (Optional)
- Dremel 8220 Rotory Tool
- Dremel Bit - 1/2 Sanding Drum
- Dremel Bit- EZ Lock Cut-off Wheel
- X-Acto Blade
- Side/Wire Cutter
- Channel Lock Pliers
- Small Pliers (optional)
- Metal Scribe (optional as you substitute for a marker)
- 4 x Clamps (optional)
- 4 x Bins to organize keyboard parts (optional)
- (Safety)Protective Eye wear
- (Safety)1 Pair of Gloves
Materials Needed:
- 1- Keyboard with higher profile keys
- 1- Keyboard with lower profile keys
- 2- USB Cords from Keyboard
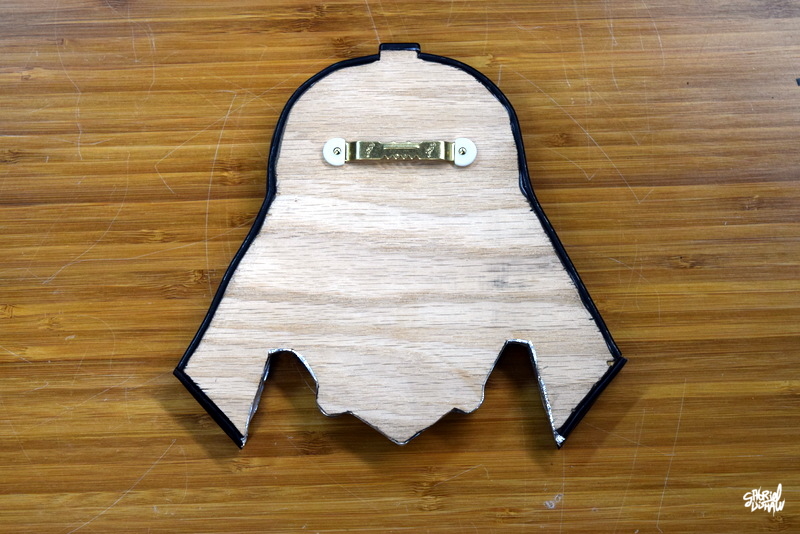
- 1- Quarter Inch thick piece of plywood that is at least 17 inches wide and 8 inches tall
- 1- Super Glue
- Download Darth Vader Template (click button below)
- 3- 8 1/2 by 11 sheets of paper
- 1 can of flat black paint
- 1 - Picture frame hanger (optional if you don't plan on hanging it on a wall)
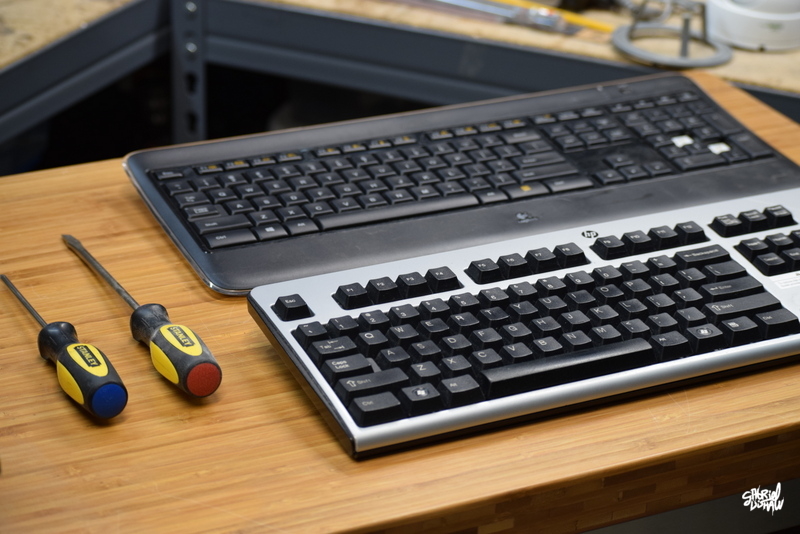
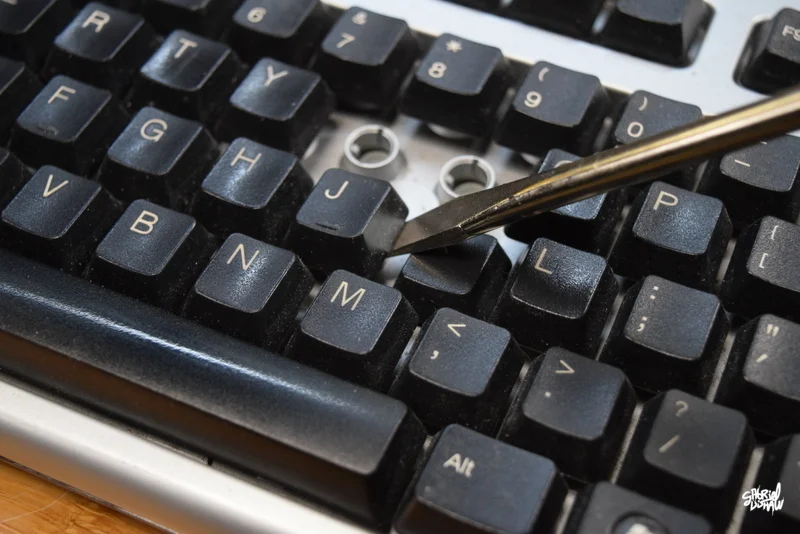
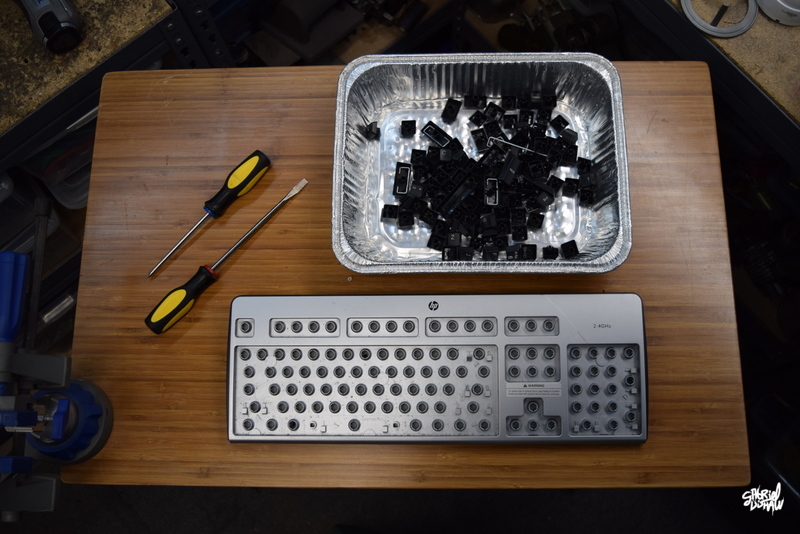
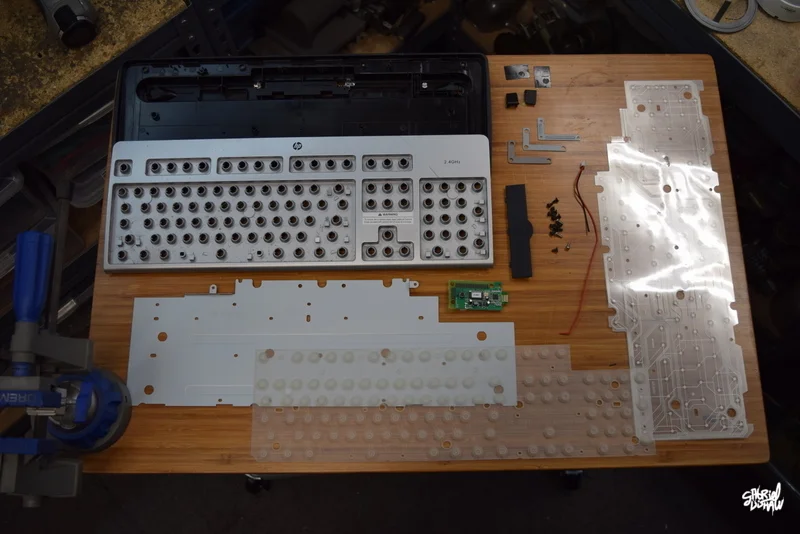
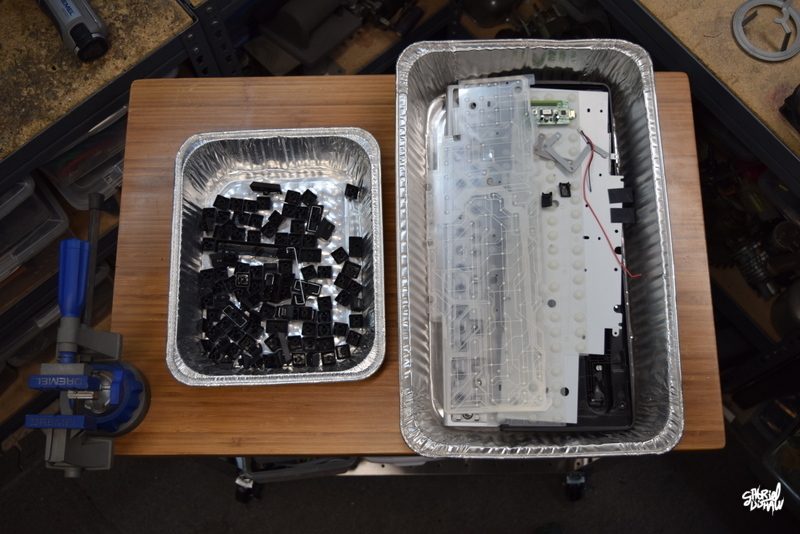
Step 1 - Disassembling
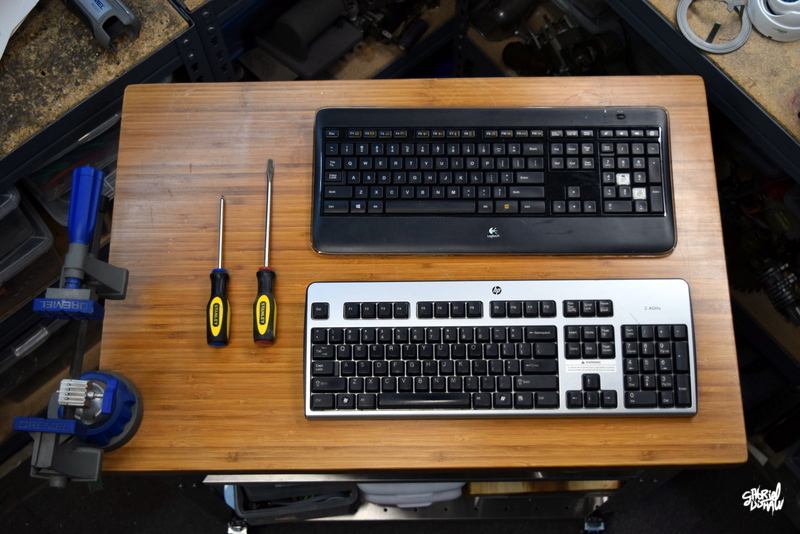
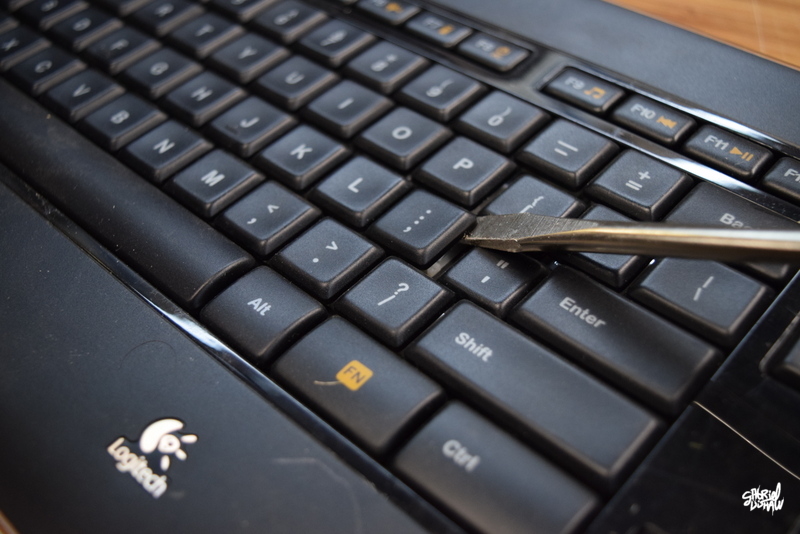
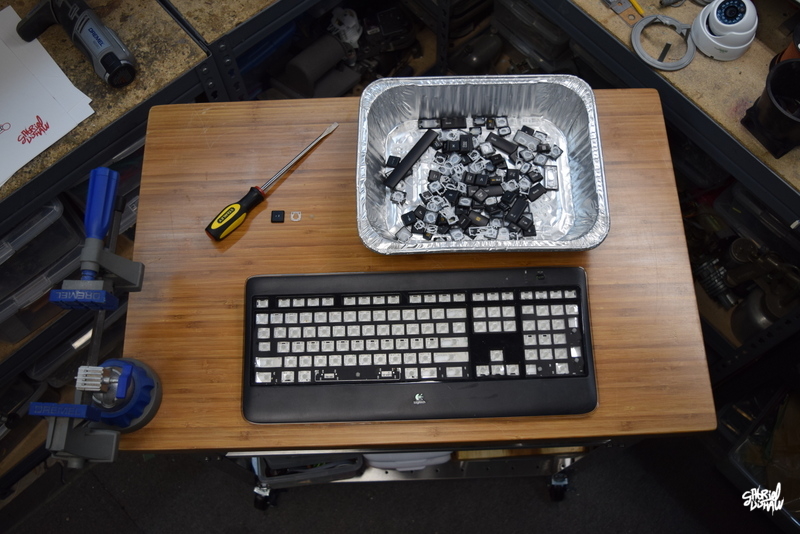
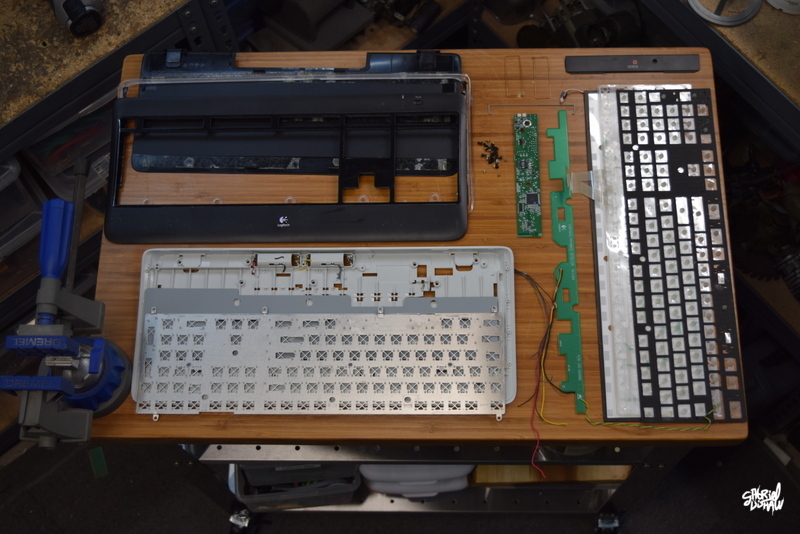
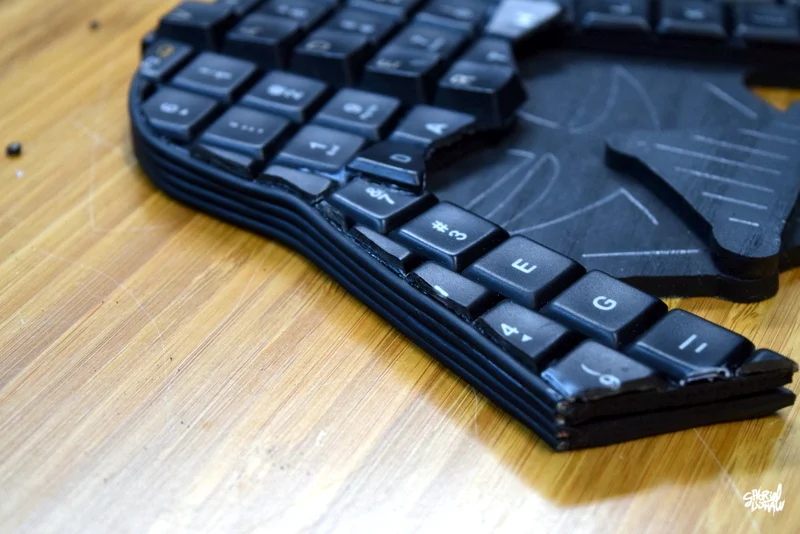
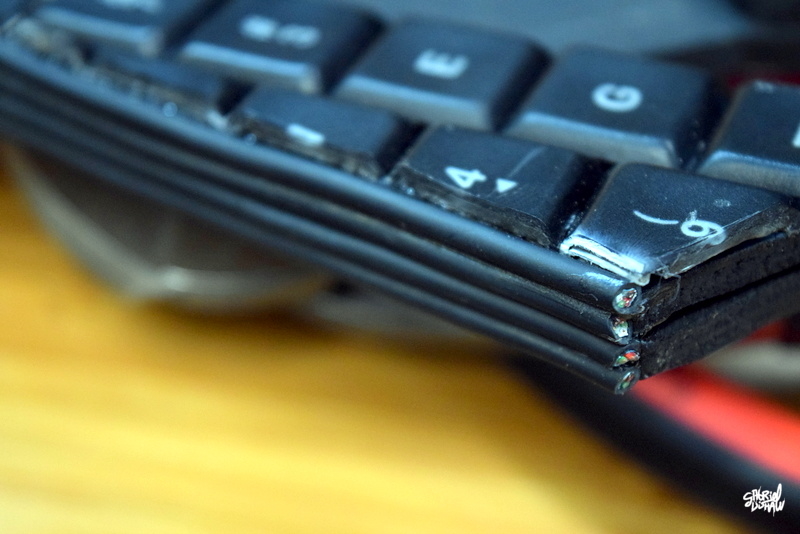
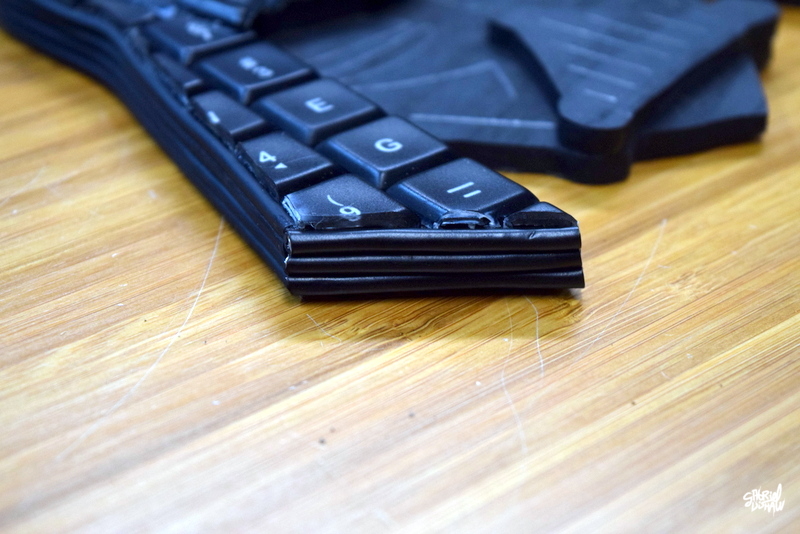
Every upcycling project starts with the fun exercise of taking something apart. The goal is to reduce the item down to its smallest parts so that you have materials to work with. For this particular project I used two old keyboards. During the dis-assembly process I want you to be thinking about each piece that comes from the keyboard and how you might fit into your Darth Vader Sculpture.
Below are some helpful images, tips, and hints regarding dis-assembling your keyboards. Every keyboard is a little different, but should contain basically the same stuff. To complete this step you will need the following tools/materials:
- 1 - Keyboard with Low Profile Keys
- 1 - Keyboard with High Profile Keys
- Flat Head Screwdriver
- Phillips Head Screwdriver
- Safety Glasses and Gloves
- 4 Bins to organize keys and parts (optional)

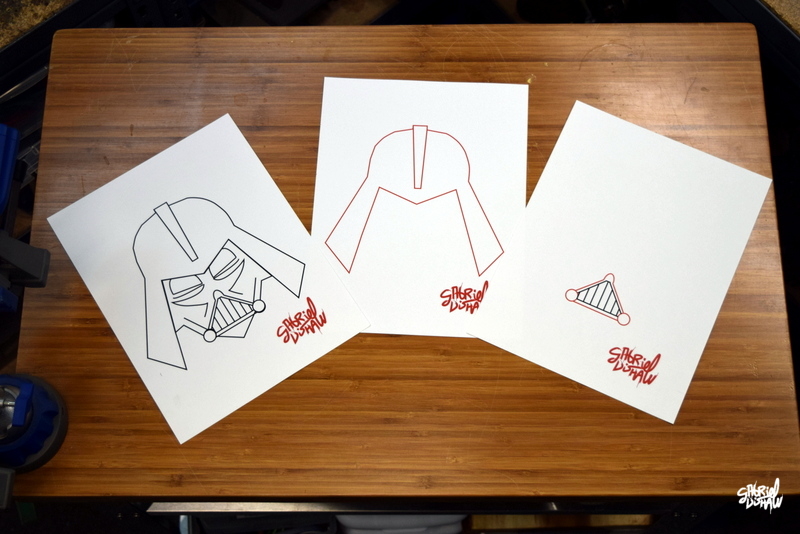
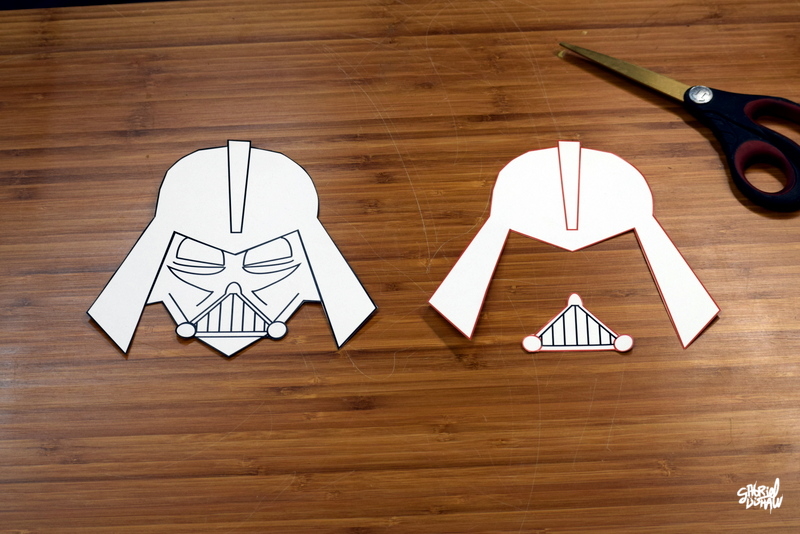
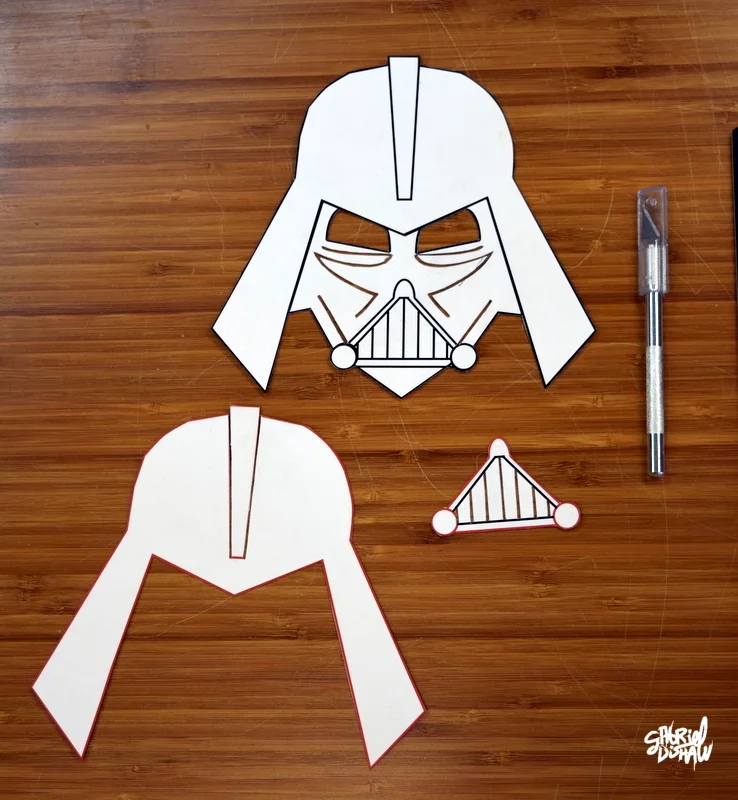
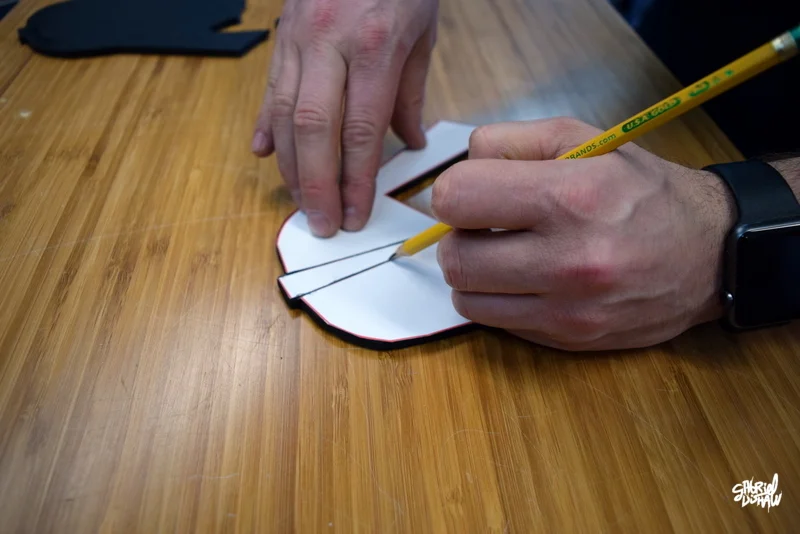
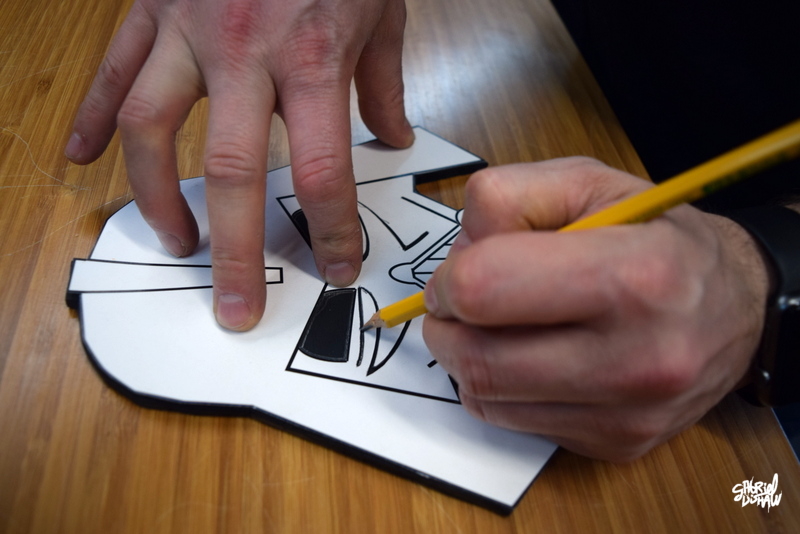
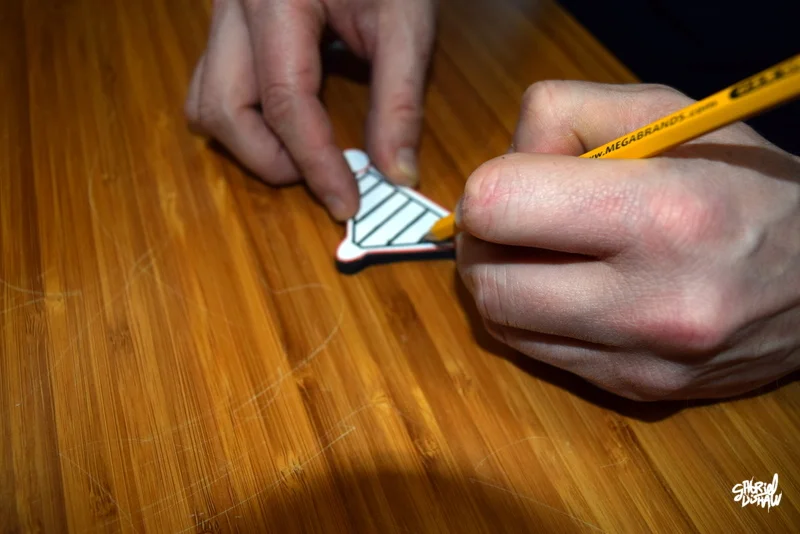
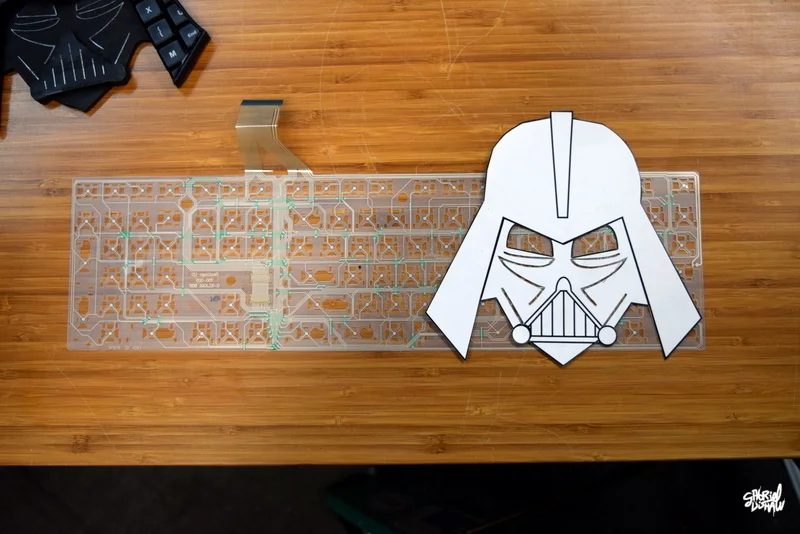
Step 2 - Printing and Cutting out Template
In step two I will walk you through the process of printing the template and cutting out the images. To complete this step you will need the following:
- Printed Vader template
- X-acto blade
- Scissors
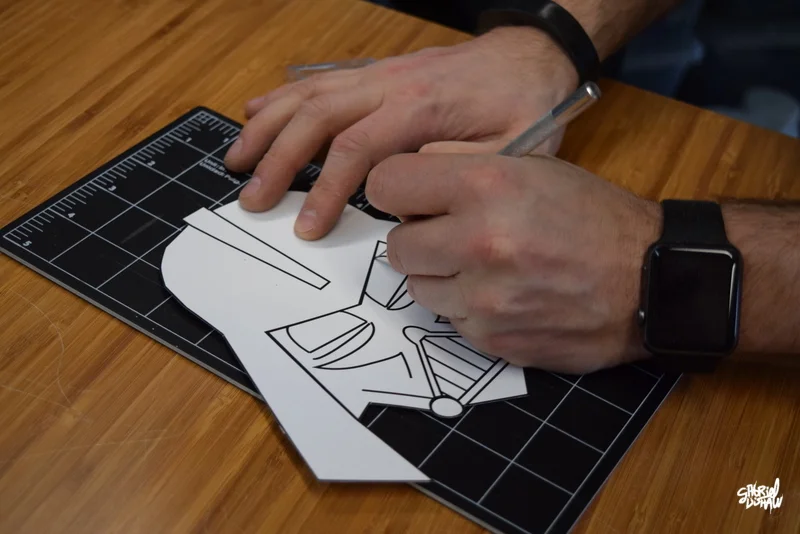
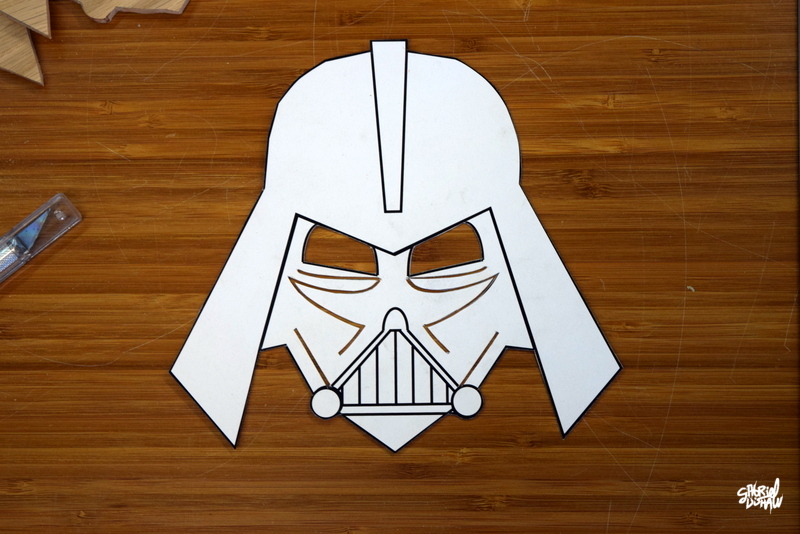

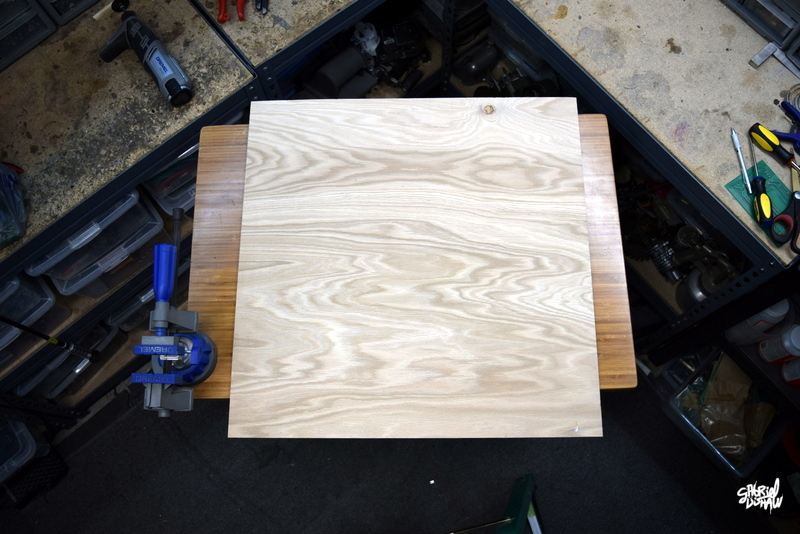
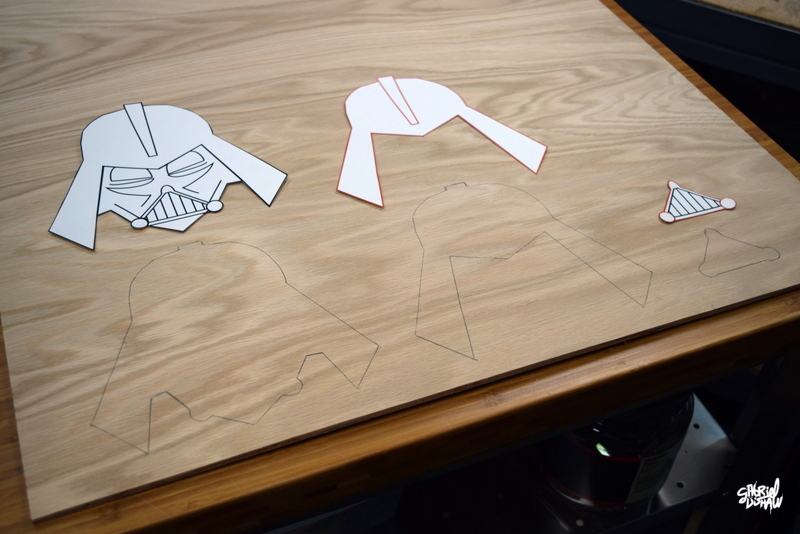
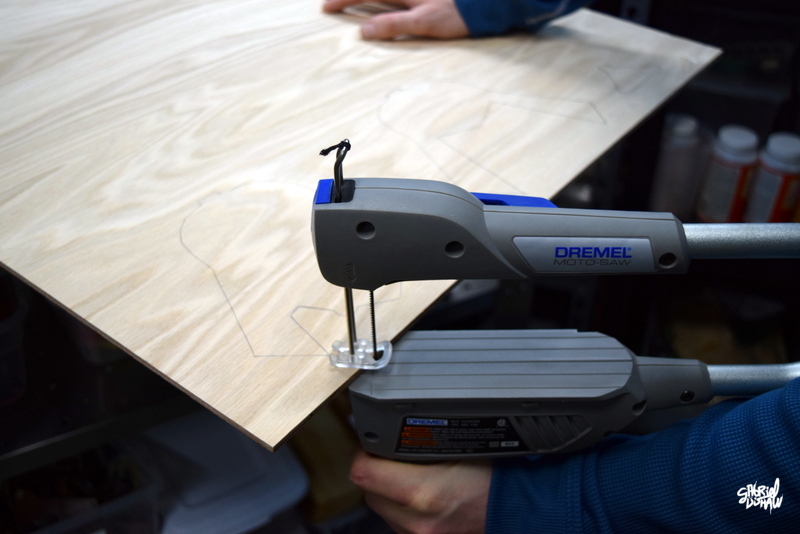
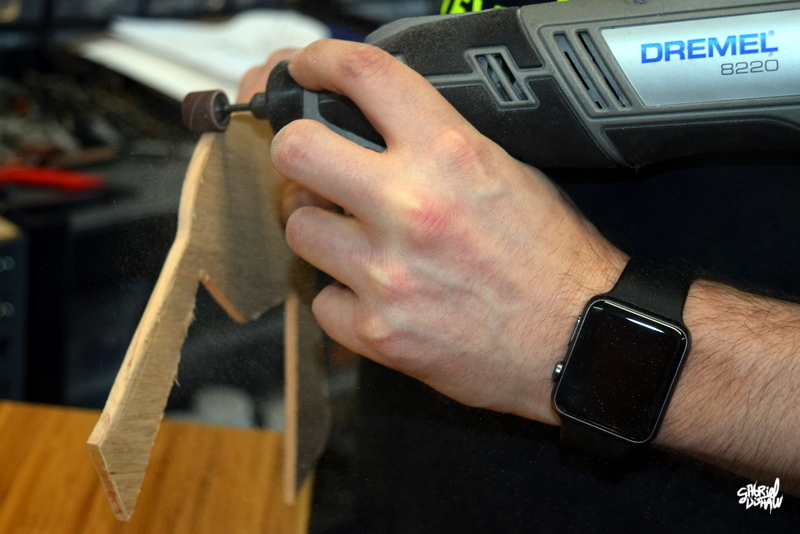
Step 3 - Trace Template Onto Wood and Cut Out
In step three we will trace the template onto your piece of wood and cut it out. To complete this step you will need the following:
- Pencil
- 1 x 1/4 inch thick piece of wood that is at least 17 inches wide and 8 inches tall
- Dremel Moto Saw
- Dremel 8220 Rotory Tool
- Dremel Bit - 1/2 Sanding Drum
- Safety Glasses and Gloves


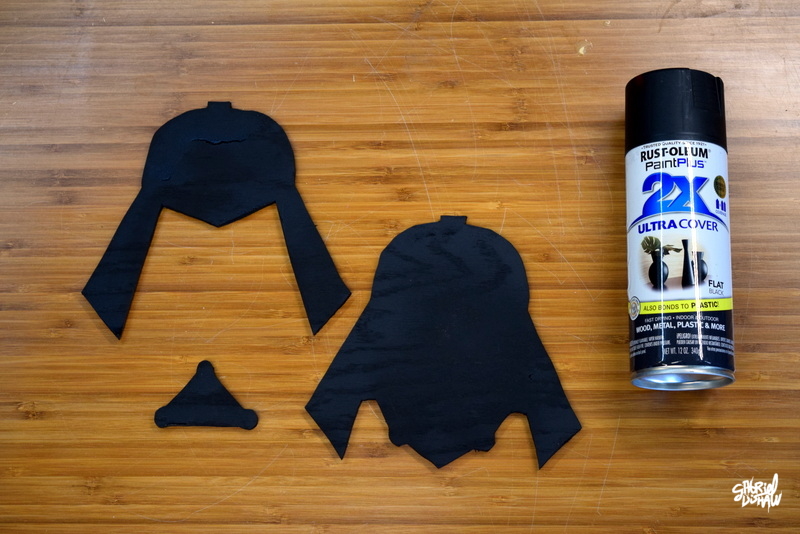
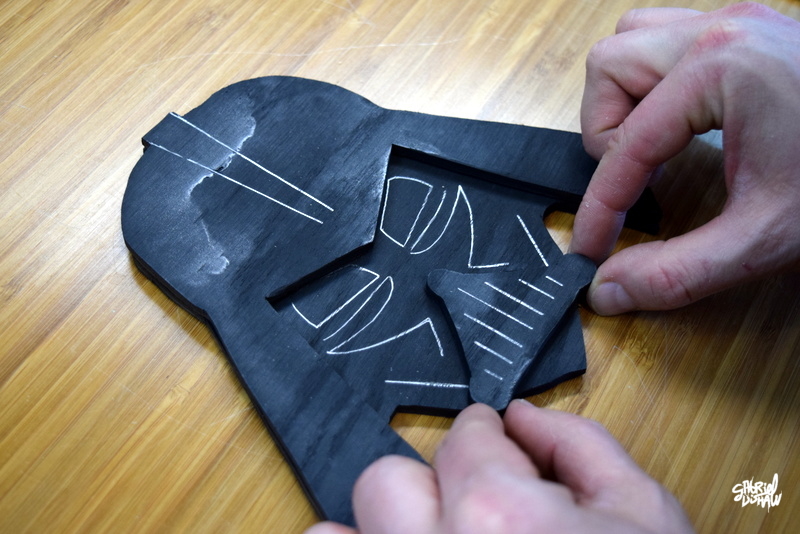
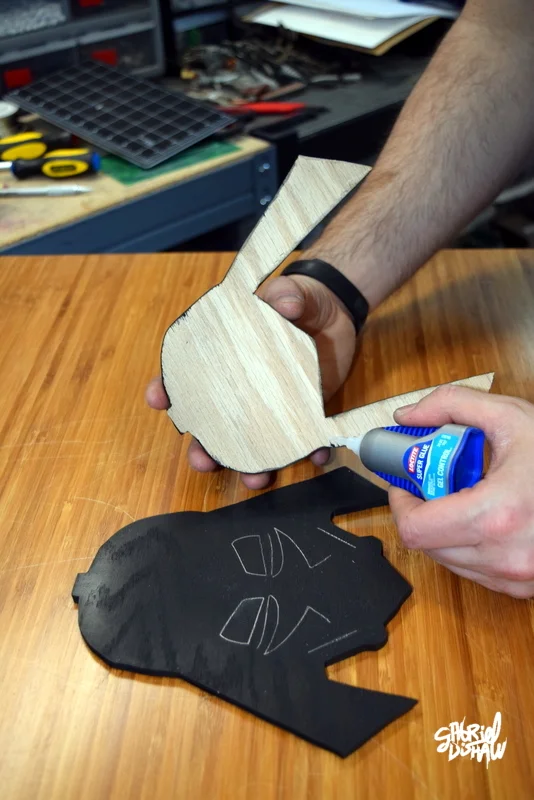
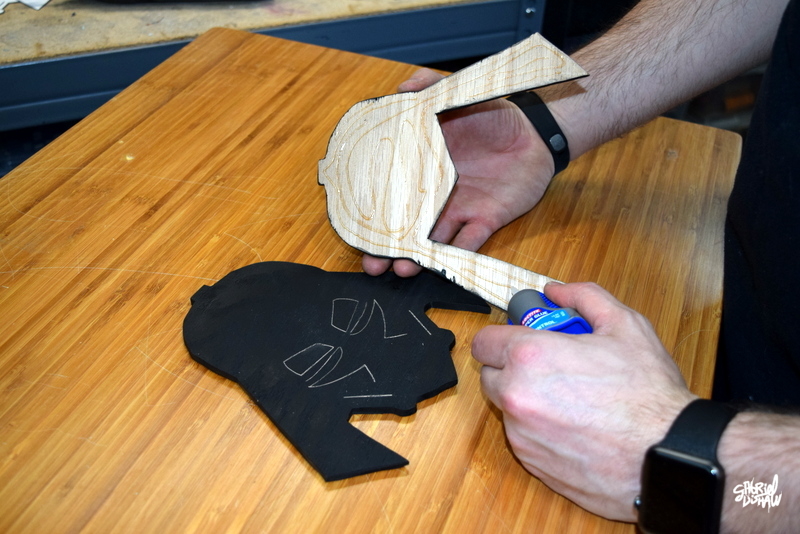
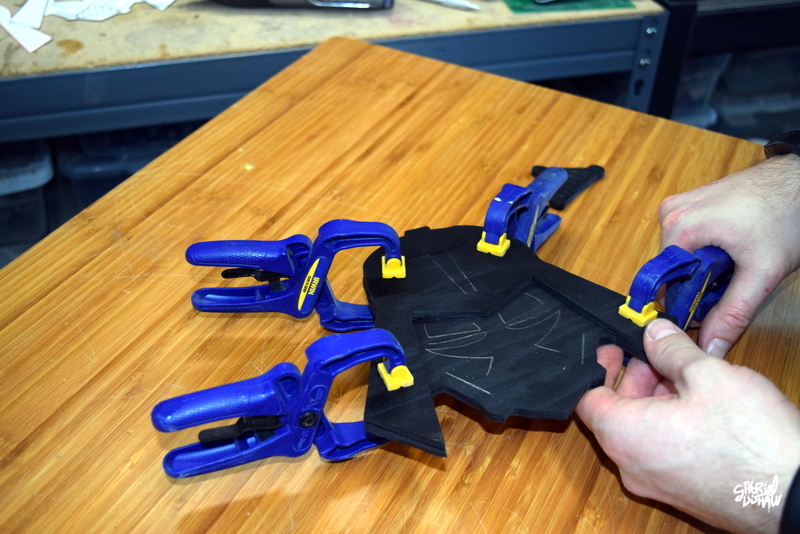
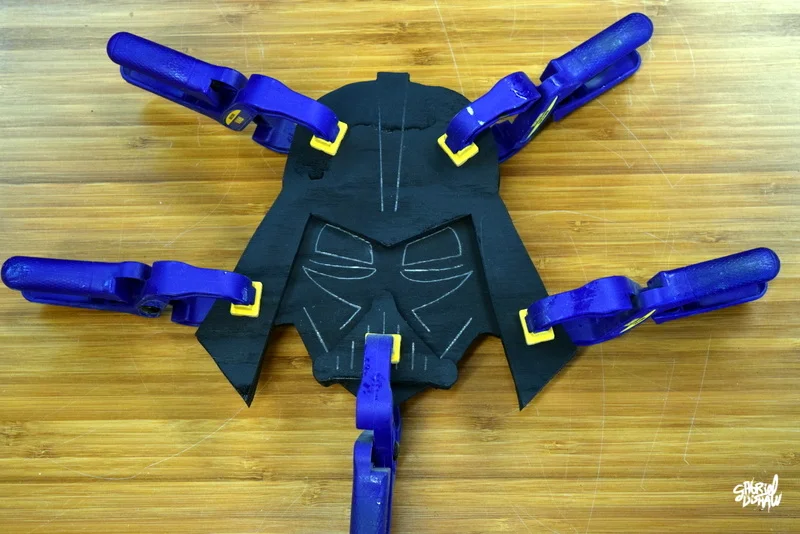
Step 4 - Paint, Trace Details, and Glue
Step four involves the process of painting the cut outs, tracing a few details onto the surface in order to aid our placement of the upcycled materials, and gluing the 3 parts together. To complete this step you will need the following:
- Pencil
- 1 - Can of Flat Black Paint
- Super Glue
- 4 X Claps

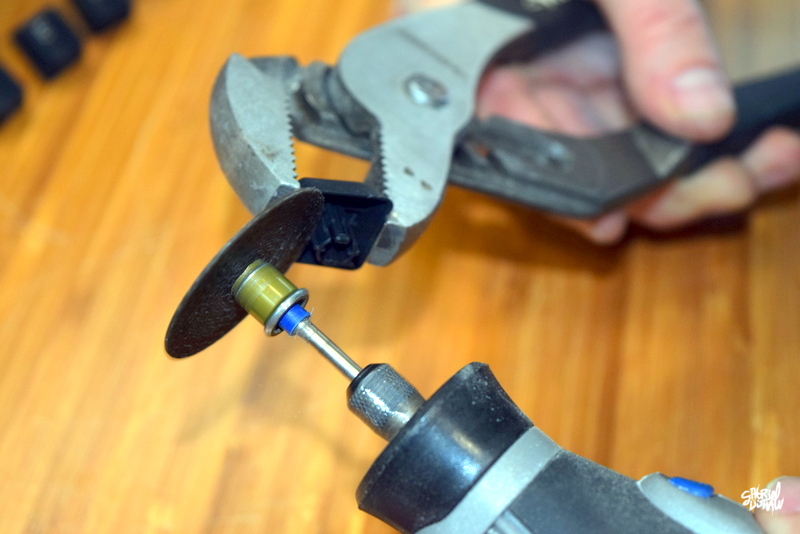
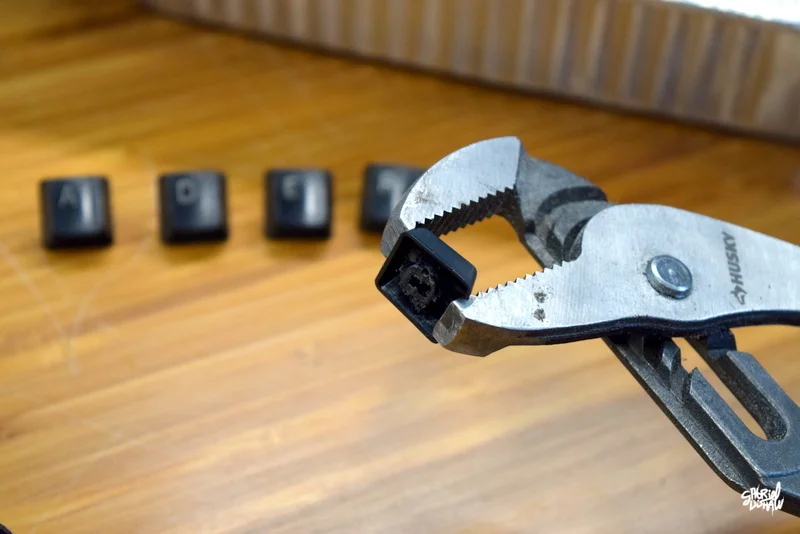
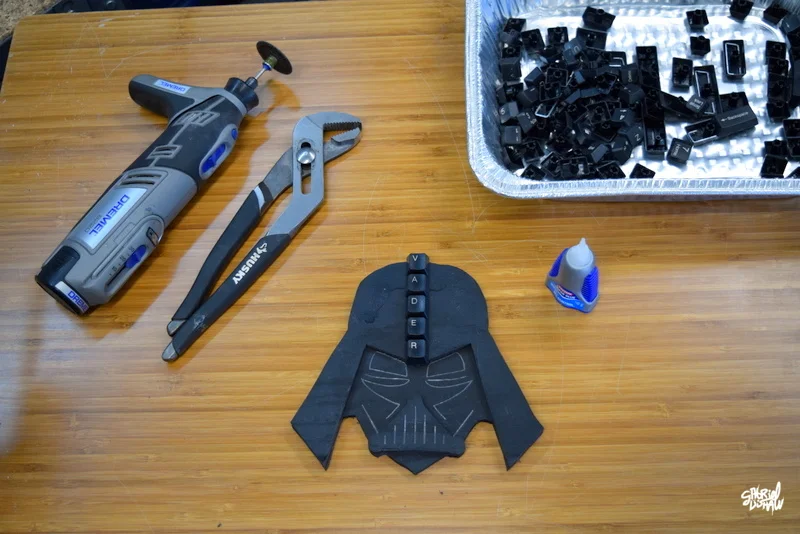
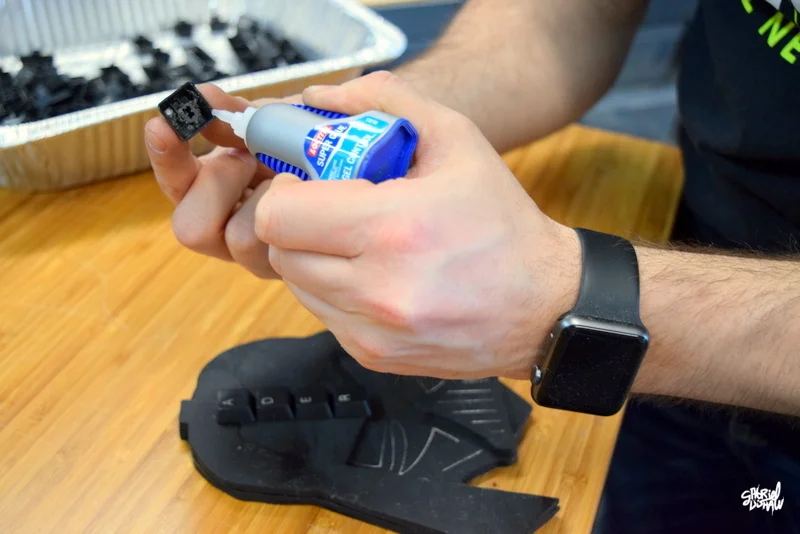
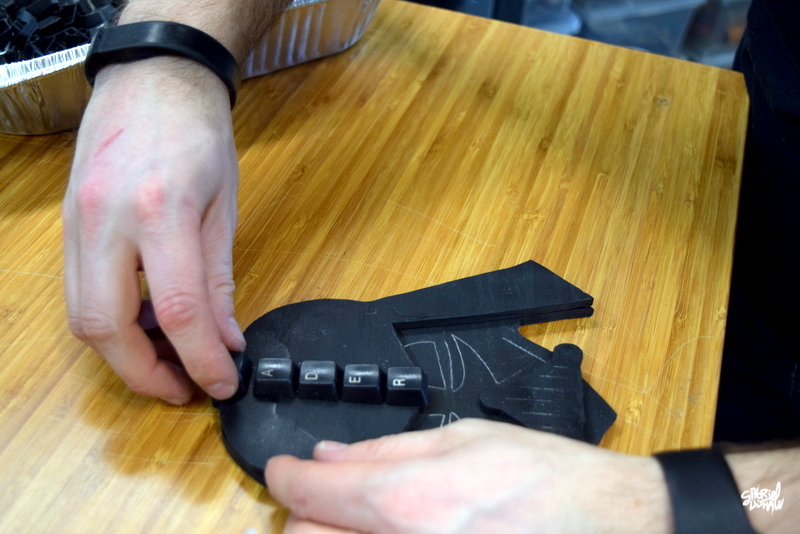
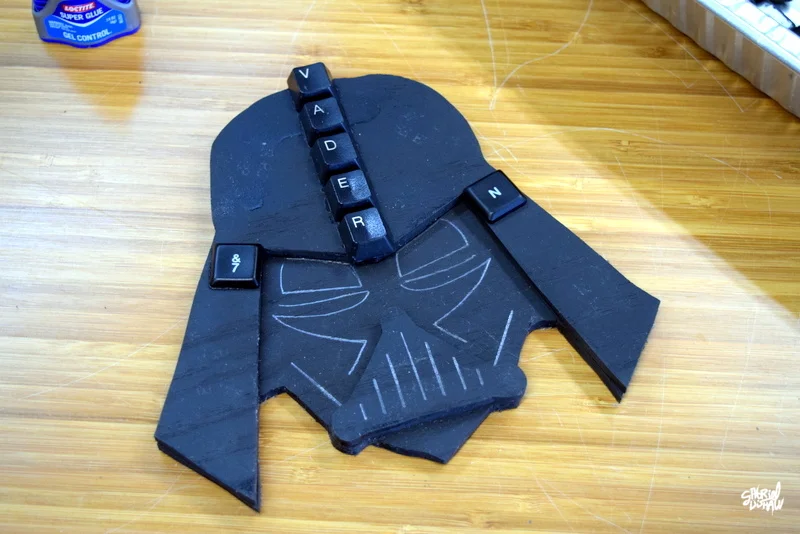
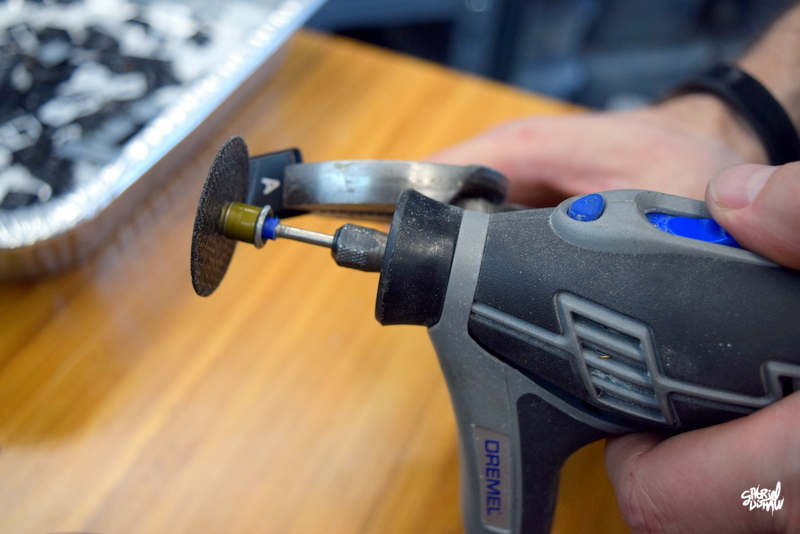
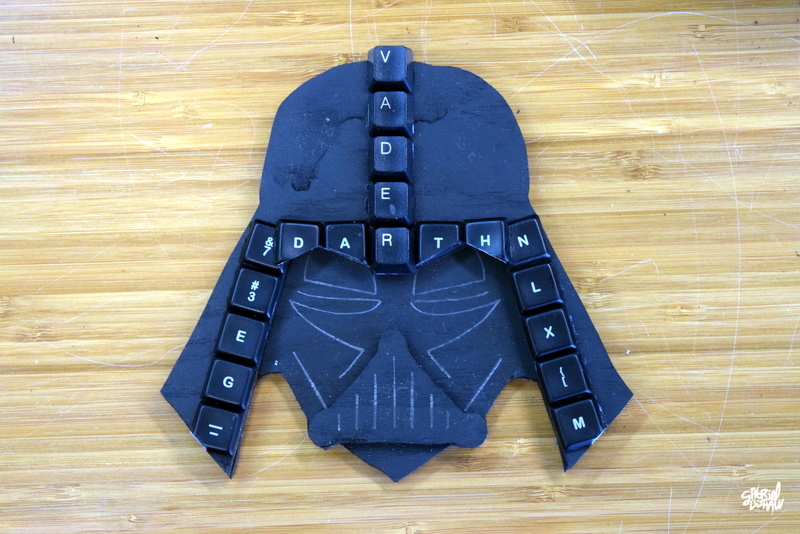
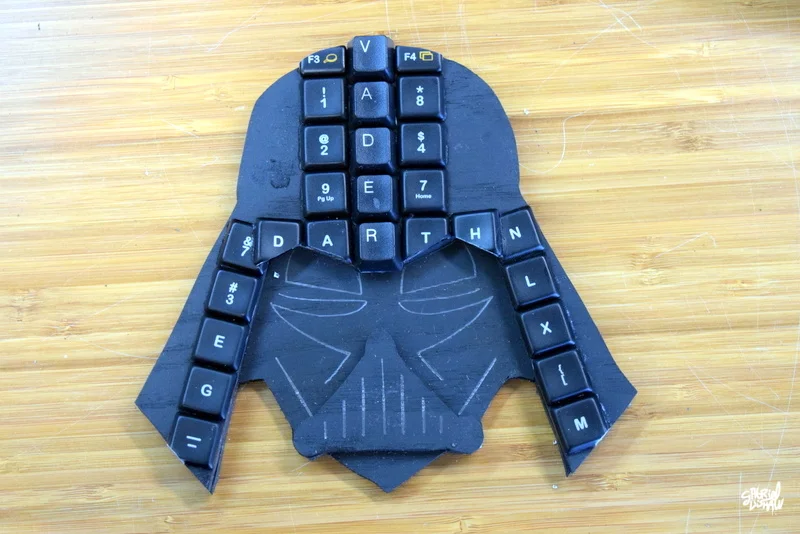
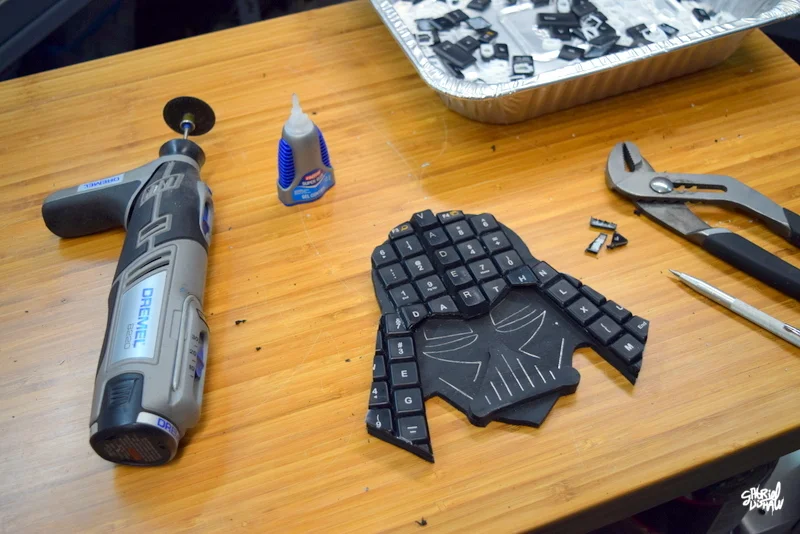
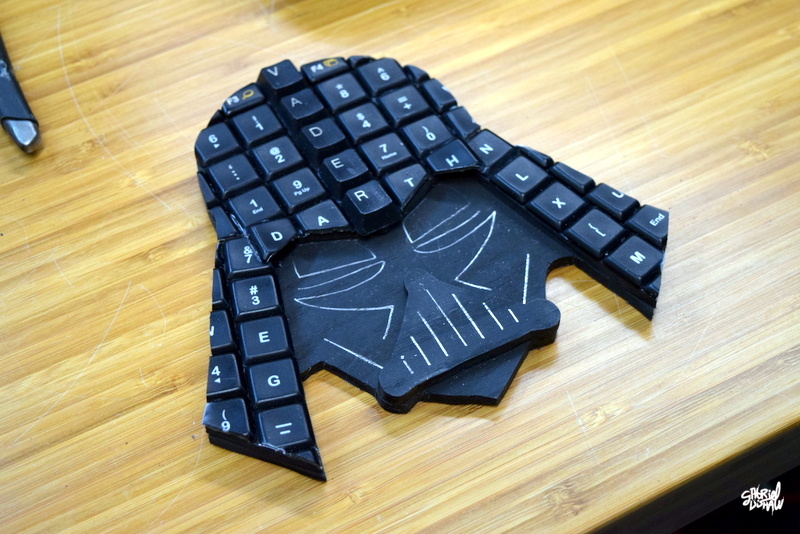
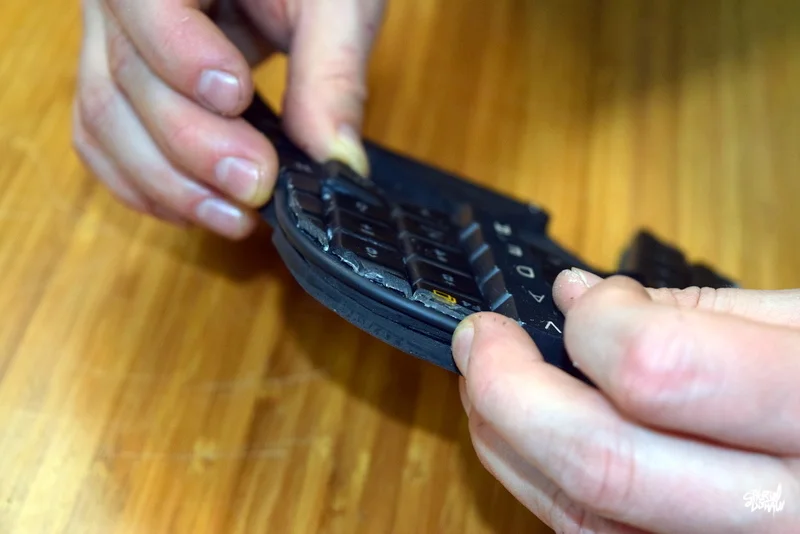
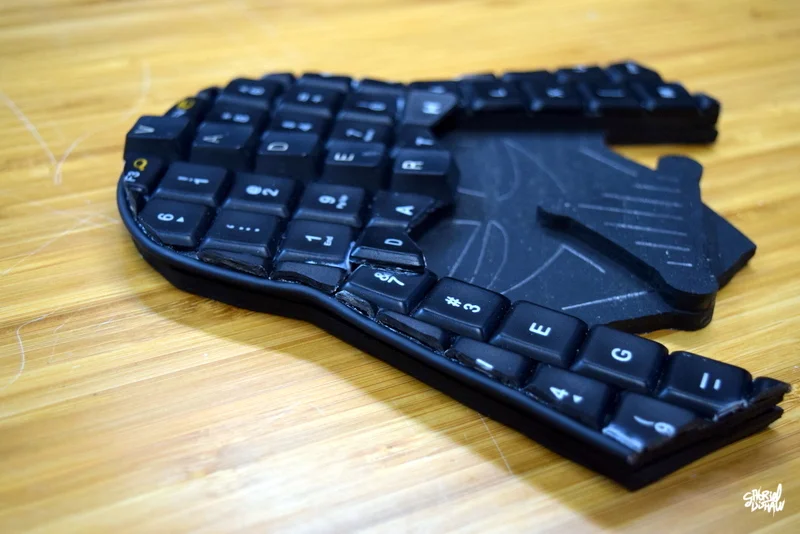
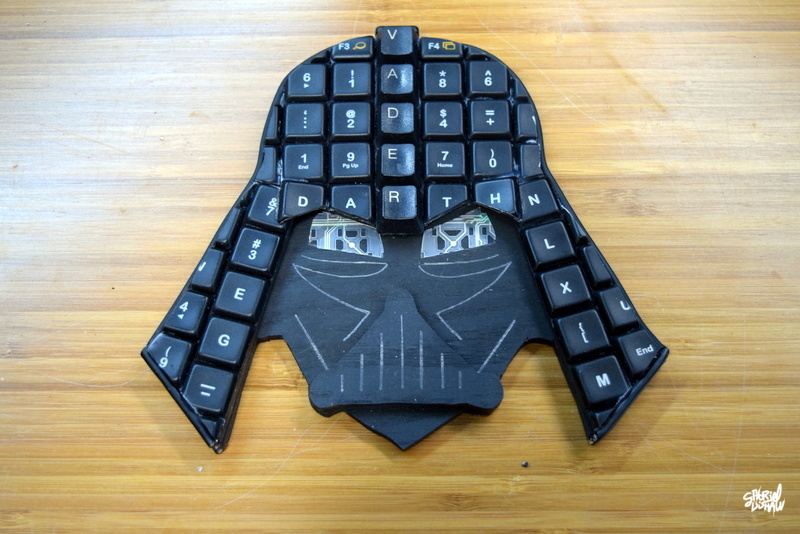
Step 5 - Applying Keyboard Keys
In step 5 we will prepare the keyboard keys and apply them to Vader's hood. To complete this step you will need the following:
- Channel Lock Pliers
- Small Plier
- Super Glue
- Dremel 8220 Rotory Tool
- Dremel Bit- EZ Lock Cut-off Wheel
- Metal Scribe
- Safety Glasses and Gloves

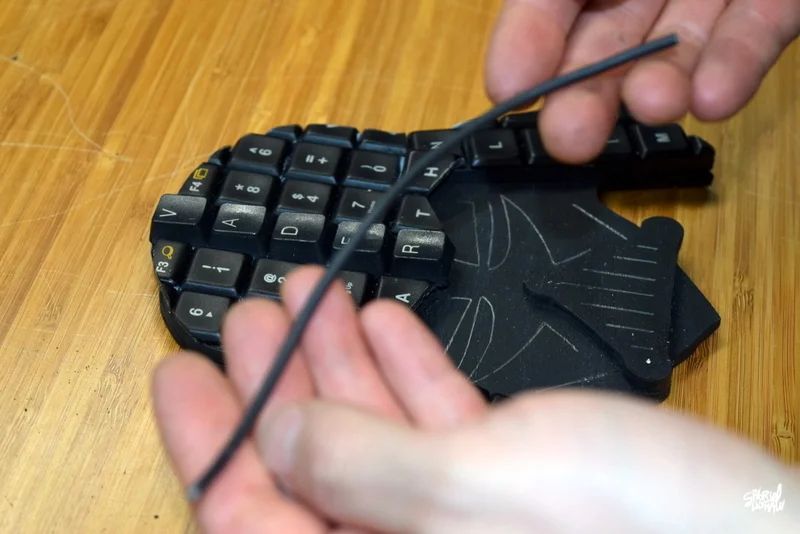
Step 6 - Apply Wire Trim to Edges
For this step we will edge Vader's hood with wire. To complete this step you will need the following:
- Side/Wire Cutter
- 1 - Keyboard cord
- Super Glue
- Safety Gloves

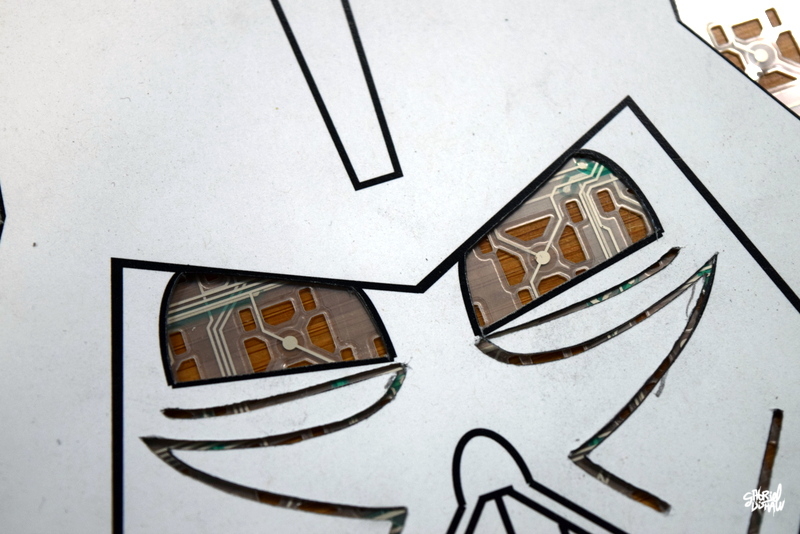
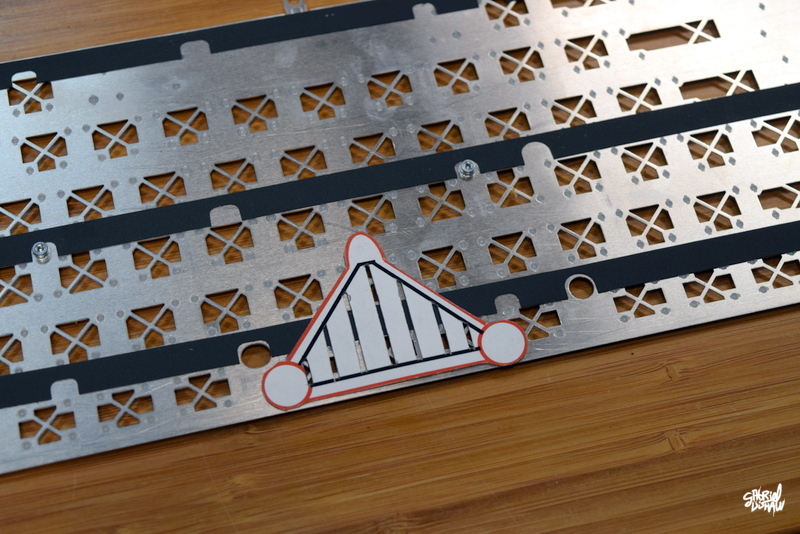
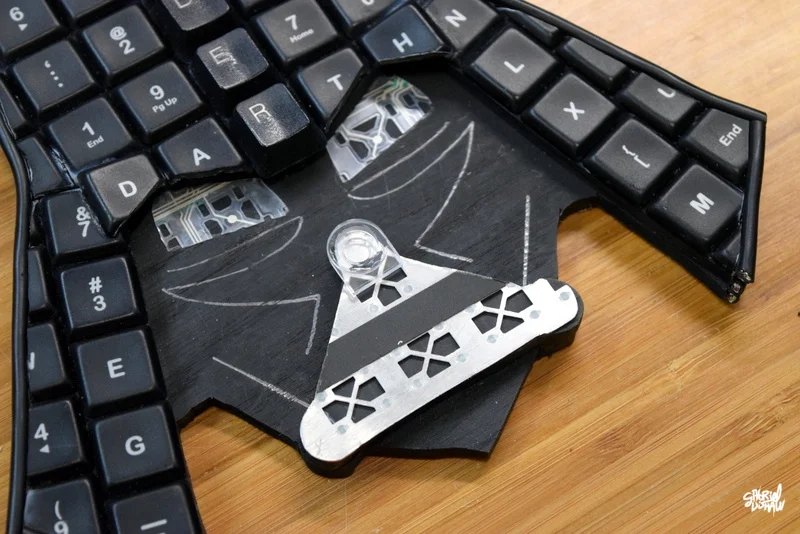
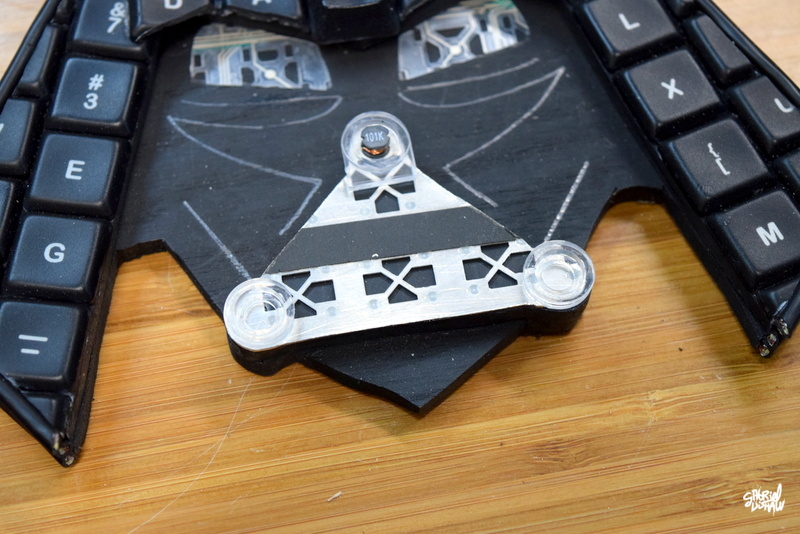
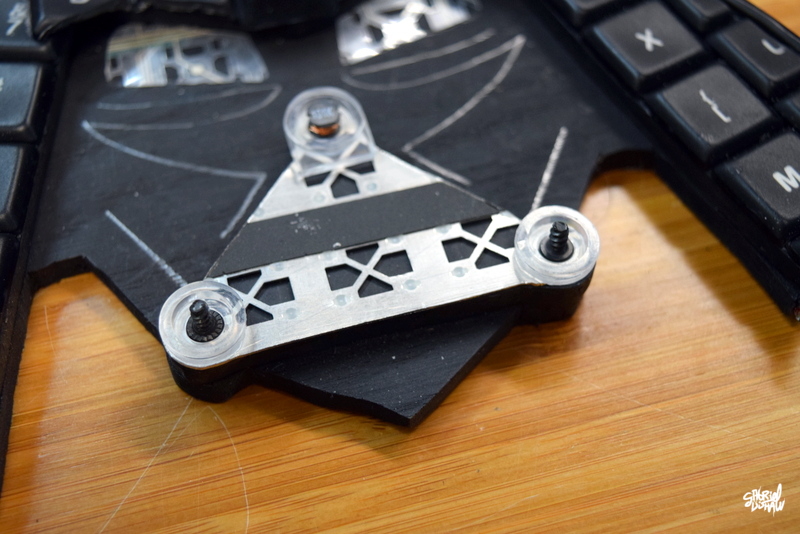
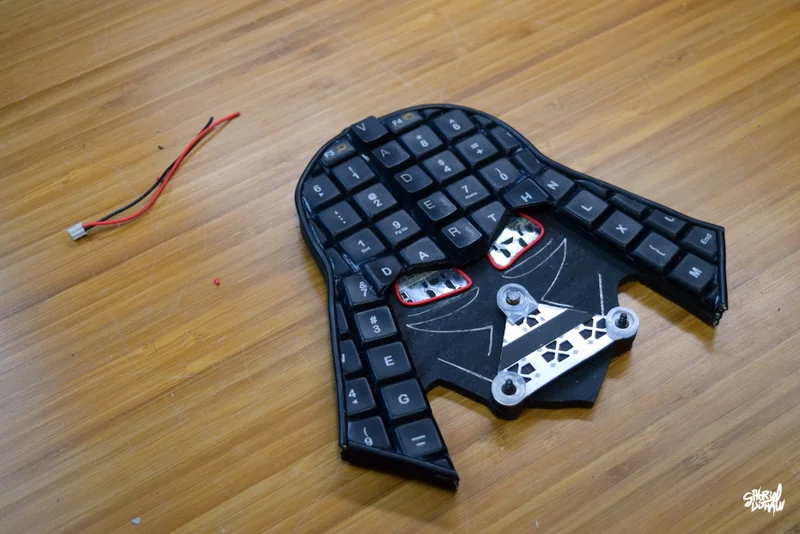
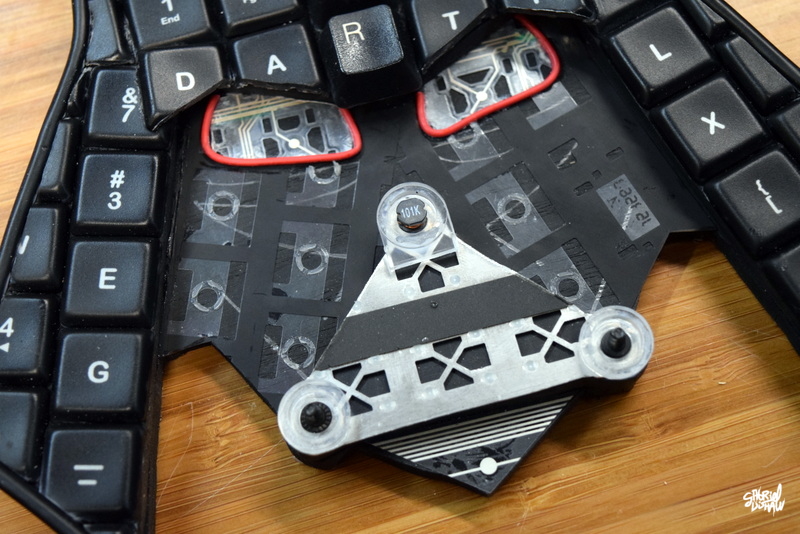
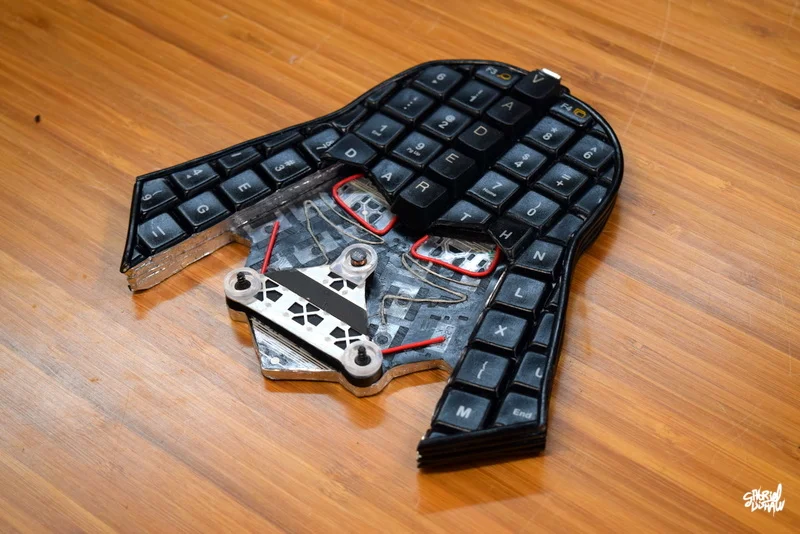
Step 7 - Apply Eye and Mouth Vent Details
For step seven, I will walk you through the process of creating Vader's eyes and mouth vent. Up until now I'm sure you have been able to follow along and almost create an identical piece to the example shown. In the spirit of creativity this is were I will ask you to start exploring your keyboard parts and creating a sculpture that is uniquely yours. Utilize the next few steps as a guide to help you achieve your very own "Custom Vader." To complete this step you will need the following:
- X-acto Blade
- Keyboard Circuitry
- Keyboard Housing / Bracket
- Super Glue
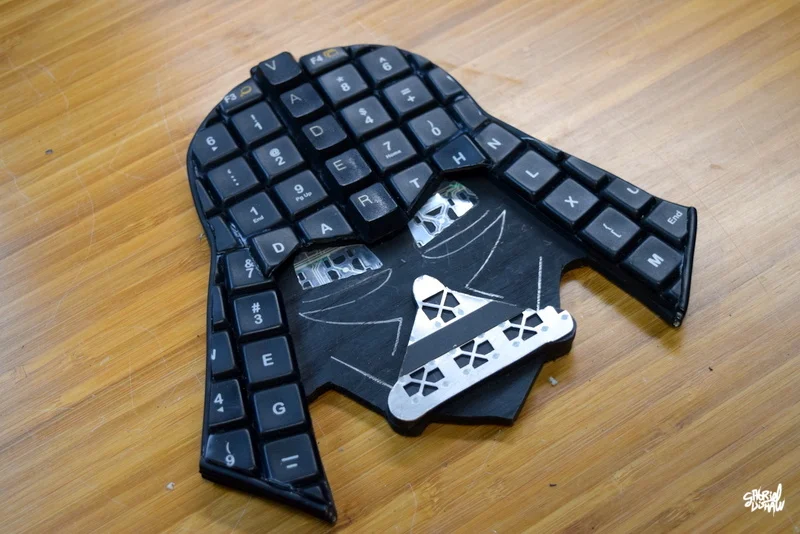
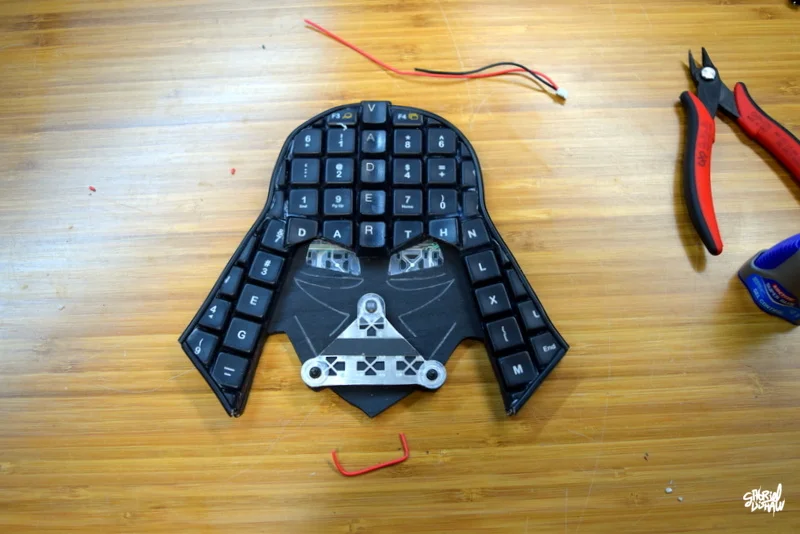
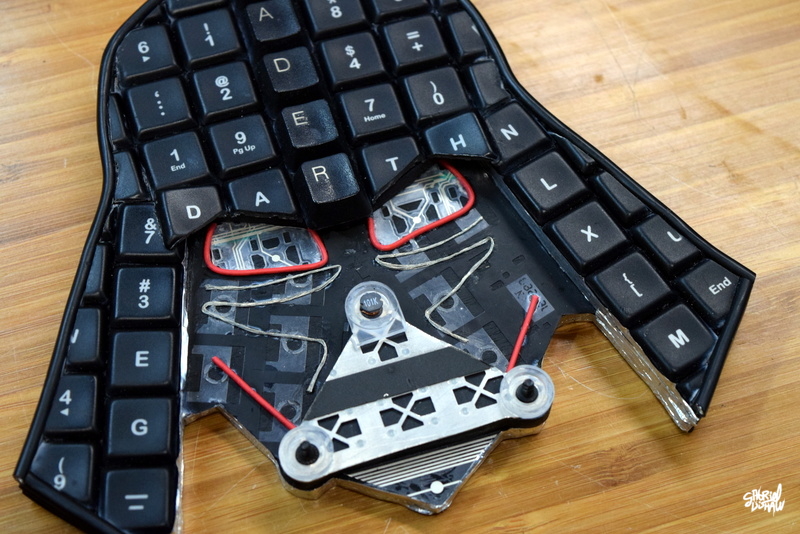
Step 8 - Apply Mask Details (Final Step)
Finally, I will walk you through the application of the final details to Vader's Mask. To complete this step you will need the following:
- Side/Wire Cutter
- 1 - Keyboard cord
- Super Glue
- Scissors

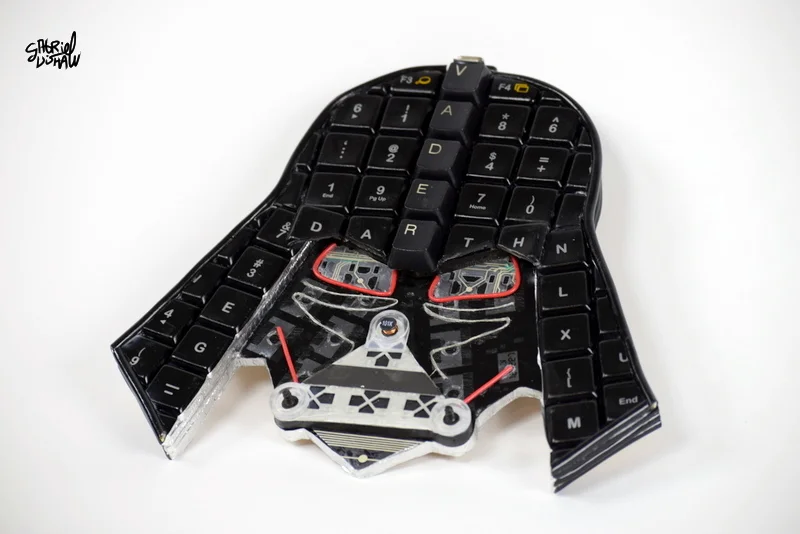
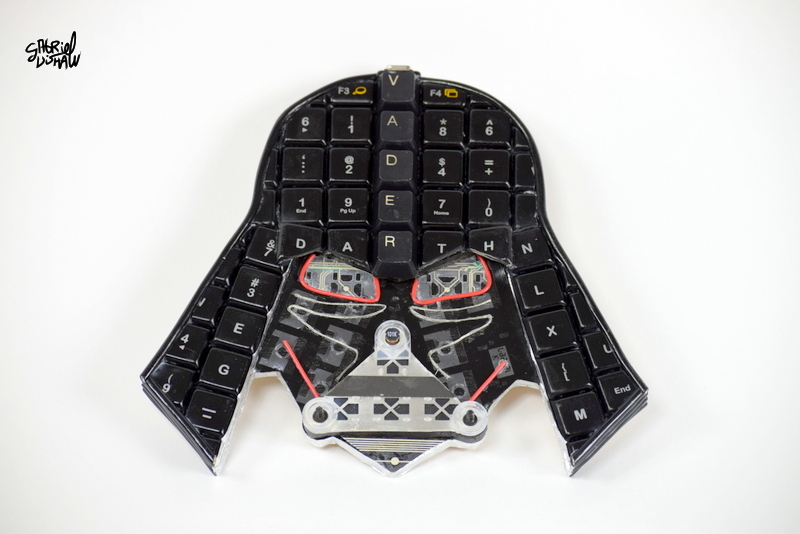
Gallery of Final Upcycled Keyboard Vader